User Management
You must be a member of "User Management" group to have access to this app
Both internal and external users can be maintained by the security team, directly in the Portal.
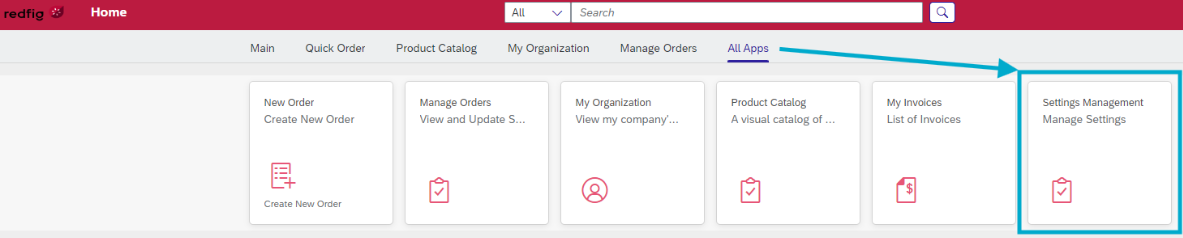
Access to User Management app
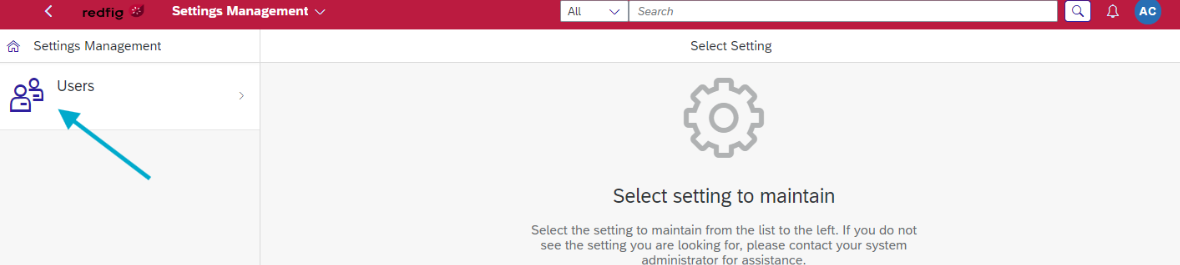
To manage users, click on the Settings Management application:
From here you can see existing users, edit their settings, create new users and export user lists. To find users, use the ‘Search Users’ bar or filter by Assigned Group using the drop-down menu:
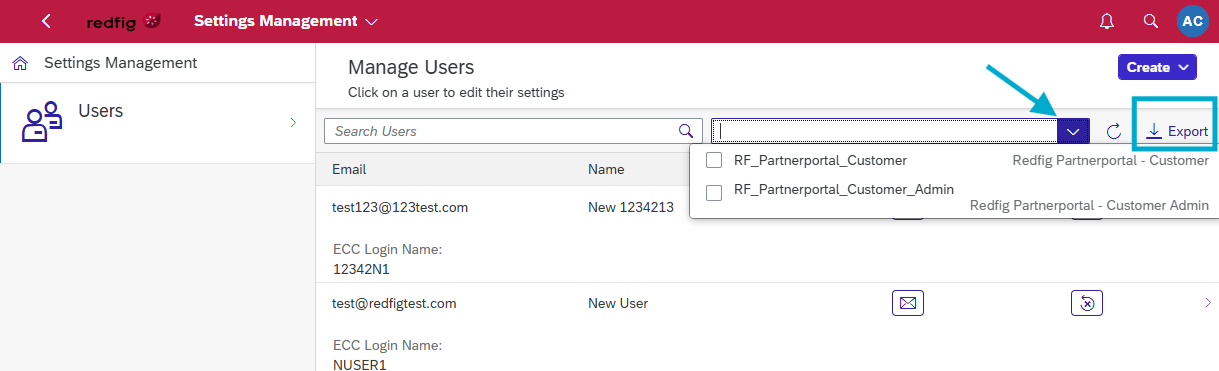
By clicking the Export button, an Excel file with the selected users and details will be generated and downloaded to your device.
Creating new users
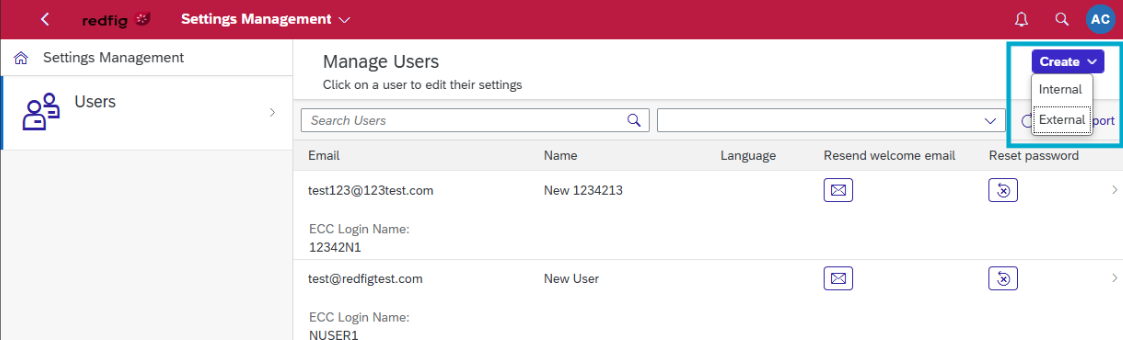
To create a new user, click on the Create button and and select which kind of user you want to create: Internal or external.
- Internal & Sales rep.
- External & Customer admin
External users can only create other External users with the same ‘Sold-to No.’ and ‘Sales Organization’, plus groups are restricted to only external roles. Functions are limited too, External users can’t sync or export the user list.
The User creation process is the same for both types of users for the 1st, 2nd and 4th steps.
Step 1
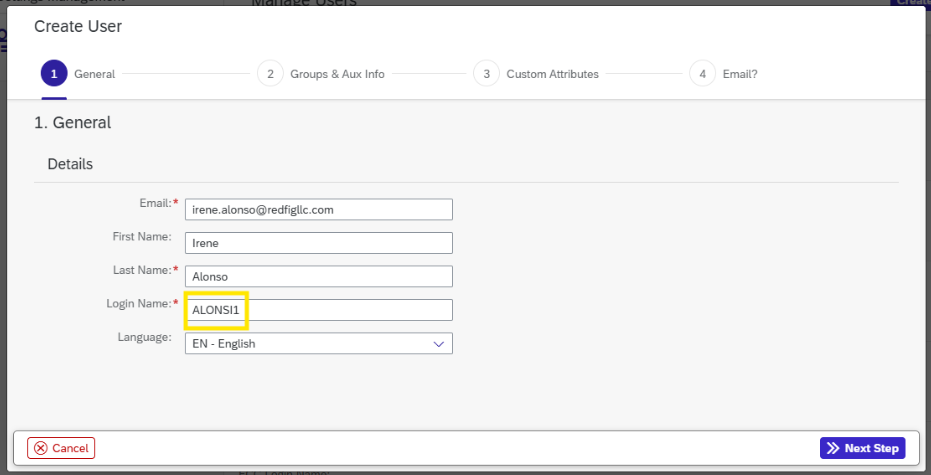
By default, Login Name is set to be composed of the ‘Last name’ followed by the first letter of the ‘First name’ followed by number ‘1’. This can be changed to whichever desired Login name.
If a user with the same primary e-mail already exists, you will be alerted when clicking the ‘Next Step’ button with the following message:

A user is not created in IAS until the ‘Next’ button is hit.
Step 2
In this step, you can select the Groups the user being created will have access to.
A Group determines which technical access is given to the user. Depending on which groups are assigned, a user can or can't do certain actions. For example, groups give permission to users to create sales order, or to manage users.
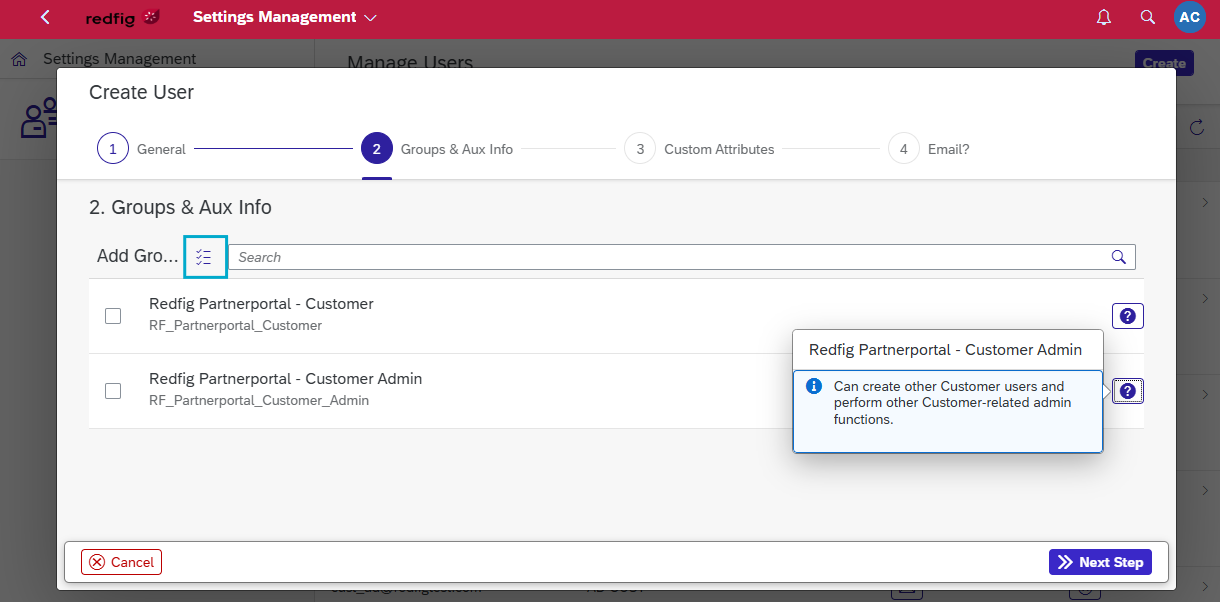
By clicking on the icon outlined in blue above, you can select all available groups, which, upon being selected, will appear listed at the top of the menu as shown below.
Click on the ’?’ icon for more detailed info on each group.
To remove them individually, click on the 'X' icon next to the group in question, as indicated by the blue arrow. To remove them all, click on the same button used to select all of them, which now appears as outlined in blue below:

Step 3
In this step, the Attributes to choose from will differ based on the type of user being created (internal or external):
- Internal admin: They can choose different ‘Sales Org’ and ‘Sold to’
- Customer admin: Attributes will be defaulted
Attributes define the functional permissions a user can have. Meanwhile Groups define the technical action (user allowed to create sales order), attributes define for whom those orders can be created (user allowed to create sales order for given customer).
By clicking on the drop-down menu above, you can add the following attributes:
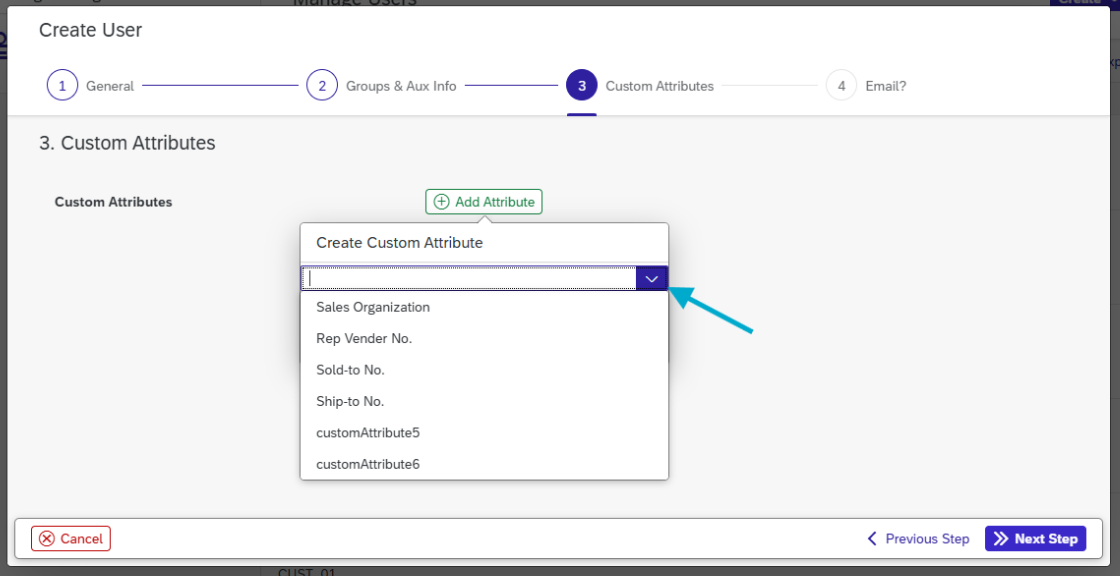
- ‘Sales Organization’ refers to the Sales Organization the users has access to.
- ‘Rep Vendor No.’ refers to the Rep this user is enabled for.
- ‘Sold-to No.’ (specific to a customer) drives the:
- customer this users is entitled to
- list of products a specific customer can see
- prices a specific customer sees for each product
- ‘Ship-to No.’ (specific to customer) determines which ship-to this user is entitled to use for a given customer.
Customer users require Sales Organization and Sold-to, with Ship-to as an optional attribute.
Custom attribute labels can be modified - speak to your support contact about modifying
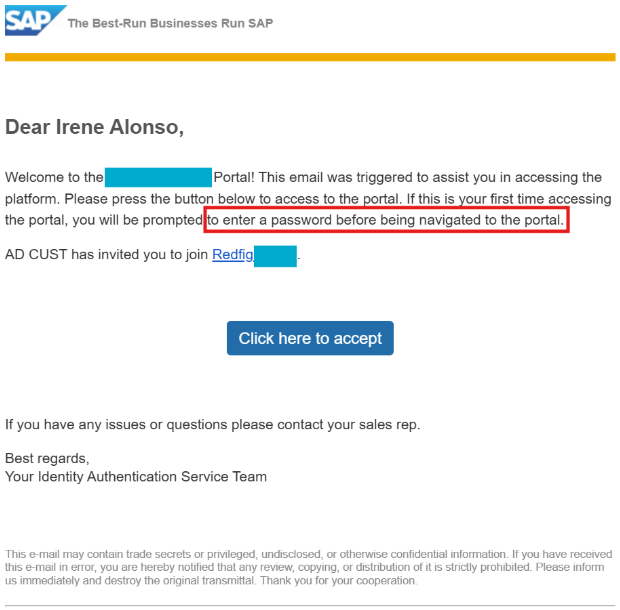
Upon clicking the ‘Next Step’ button, the newly created user will receive an e-mail from IAS like the one below, with instructions on how to access the Portal.
As stated in the below email, the first time a user accesses the Portal, they will be prompted to enter a password before being navigated into it.
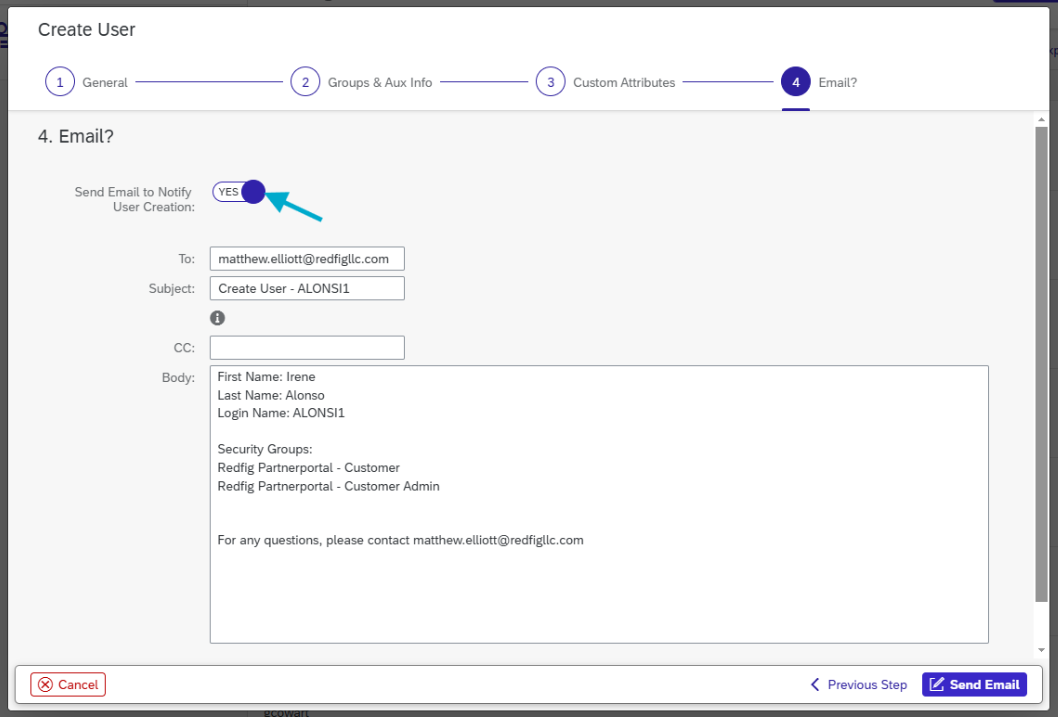
Step 4
In this step, you can e-mail whoever you want to notify of the creation of the new user by clicking the ‘Send Email’ button on the bottom right of the menu. A defaulted email address, subject, and body of the email will appear. You can edit or remove as desired.
To end the user creation process without sending an email, simply click on the button indicated by the arrow below until it says ‘No’:
Editing existing users
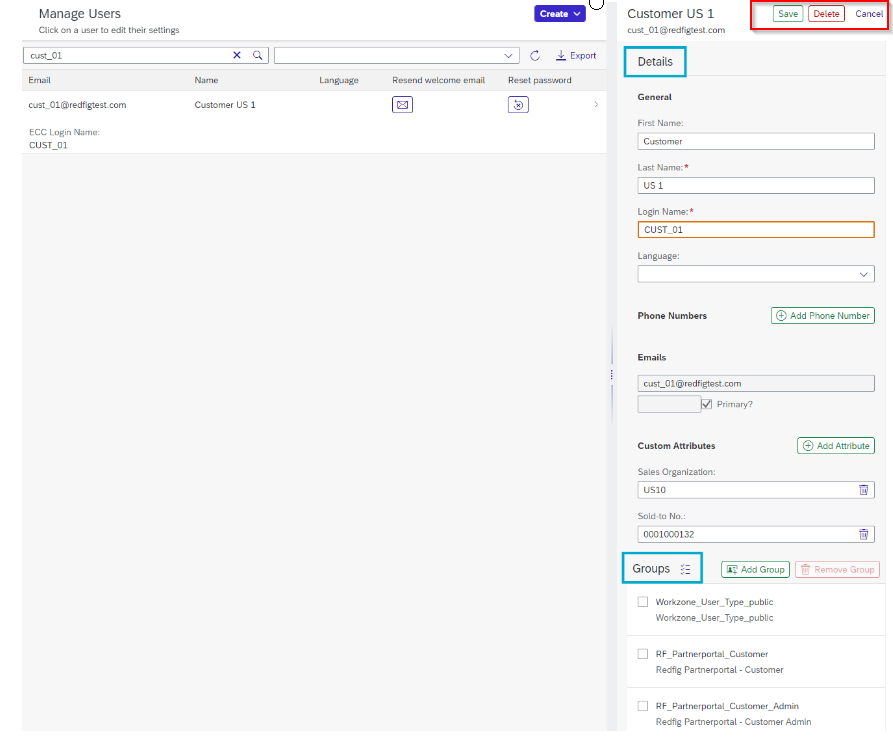
To edit a user’s profile, click on a user and the following side-bar will appear. From there, you can edit the Details and add and/or remove the user from the pre-determined Groups it is assigned to.
Details
For Details changes, make sure to click the Save or Delete buttons on the top-right corner of the screen, for them to go through.
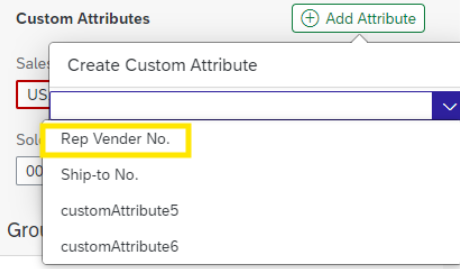
Custom Attributes
To add custom attributes, click on the "Add Attribute" button.
Once added, a "Marked for Addition" note will appear.
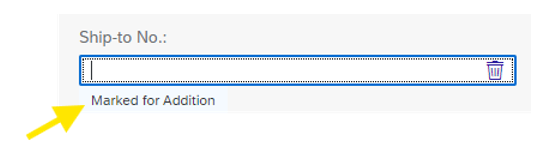
The attribute won’t be successfully added until you click the Save button on the top-right corner of the screen.
Once a new attribute is added to an account, a user will have to log out/in for that new attribute to take effect.
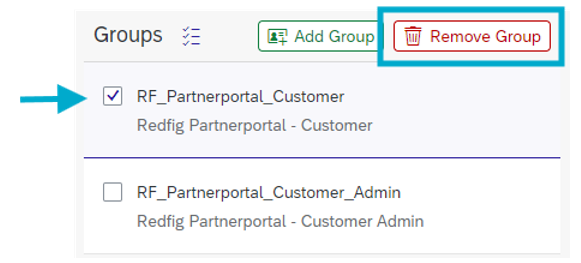
Groups
To Remove the user from one or more Groups, first select the Group/s in question, then click the Remove Group button.
Groups categories
Admin
- Typically, someone in IT that can perform admin functions for the PartnerPortal.
Customer
- Customer User can perform basic Customer functions (view/create orders/invoices).
Customer Admin
- Can create other Customer users and perform other Customer-related admin functions.
Sales Rep
- Internal Sales Rep that works for the Client. Can view and create Sales Orders on behalf of Customers.
Sales Rep User Manager
- Sales Rep who can create other Sales Reps within their organization.
Sales Rep View All
- Has access to view all Sales Order for the Client Organizations including ones where they are not assigned to the customer.
Sales Manager
- Can View and Maintain any Sales Order for their Sales Organization (if assigned in the customer attribute, otherwise, they view all globally).